Using Petroleum Jelly for temporary antenna connectors

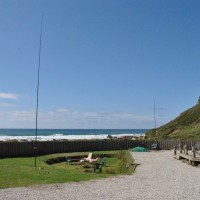
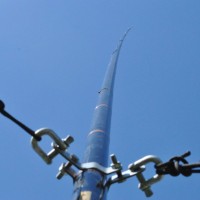
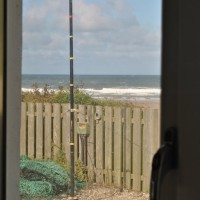
I’ve been trying to find a product to protect my temporary antenna connectors for either Field Days or my holidays near the sea. The problem is two-fold; firstly water ingress to the coax and the connectors from rain and secondly corrosion. The corrosion issue only seems to occur near salt water and spray and occurs within a couple of days.

petroleum-jellyI used to use self-amalgamating tape for Field Days but the effort in applying and removing it forced me to rethink. I started using high quality insulation tape instead – the stuff that has some nice stretch and doesn’t go brittle in the cold. This worked for many years. Unfortunately, the cheap stuff, from say Maplins might have the required insulation properties but has a brittle plastic feel and not very pliable – it’s certainly difficult to make waterproof between layers. Last time out for Wythall Radio Club SSB Field Day, torrential rain found its way through a crack between two layers of tape and the SWR went high.

Continue reading

TS990s External Keypad

I recently had the privilege of dealing with Chris Taylor of Taylor Made RF who supplied me his rather excellent custom keypad for the Kenwood TS990s.

Chris gives the device the part number TMRF TS990KP and it follows the convention as outlined in the user guide 16-7 of the TS990s user manual which allows for the user to program each of the 8 function keys a specific task, for instance; change antenna, play a recorded voice macro or change filters. An extremely handy accessory.

DSC_0242

Of course, you could build one of these but for an “appliance” operator and for sheer mini-bling, the TMRF TS990KP is a delight to use. It comes very nicely packaged with basic instructions, a simple 3.5mm jack to jack stereo lead and of course, the engineered keypad.

Continue reading

How to make a stealth amateur radio wire antenna

Until recently, I had a) a 40m triangular loop in the back garden which I called a “micro-mega-loop” and b) a 60m loaded loop that allowed me to get on 80m. The two loops looked a bit horrendous not only because of the wire in the air, but because I used halyards to lift them in the air to the top of wooden stair rails. It was all very messy. They were also extremely close together along the back of the garden which meant some of my RF was absorbed by the other loop. See here: https://www.m0mcx.co.uk/sg-230-feeding-60m-skyloop-deltaloop/

DSC_0217I like loops for two reasons, a) for my small garden plot, I can achieve in half the size, what other do with a full size dipole and b) a resonant loop will also resonate on every harmonic, that means tuning a 40m loop at 7.1 Mhz means I also get 14.2, 12.3 and 28.4 Mhz.

Continue reading

Marine Vertical Installation with Radials

img_2150Having installed my old Shakespeare Marine vertical a while ago as a ground-mounted vertical, today was radial laying day. I’ve read that laying your radials out in the spring, across the lawn, means that the grass will grow up and gradually bury them under the grass thatch. I hope so!

Since I’m only having a test, I laid out 16 radials across a 180 degree arc. I can’t lay any radials in the other arc since the house is in the way.

img_2143I used PVC coated 7 strand D10 military wire which has seven small strands; four steel and three copper. They are the maximum length that fits in my small yard here, between about 6m and 12m in length. Near the feedpoint, I drilled a large hole in a piece of redundant 1 inch wood and fed all the radials through this and under some gravel to the ATU. I did the same at each end of every radial; a small hole which allowed the D10 to snake through before hammering them into the ground under tension.  Continue reading

Email over HF – WinLink with TS-990s problem solved

This note for TS-990s geeks who are running WinMail and RMS Express.

It is natural to use the Data menu item in position one for Voice (via microphone). On-screen, this will show as “USB”, top left of the monitor. Upon holding the button “Data” for a second or two, you can confirm that the microphone is selected for this position.

  • See the problem below

Demo of RMS Express at bottom of this article

In the event that you use RMS Express with a TS-990s, Continue reading

Marine SSB Antenna Vertical or Horizontal

The diagrams included in this article were modelled with a program called MMANA. If you are inclined to give this a go, its a free download and I have produced training films on YouTube

NOTE: I have intentionally modelled the vertical antenna with a bad ground to replicate the findings of some fibreglass yacht owners who run a 15 to 20 foot copper ground strap to Dynaplates. I have modelled the horizontal antennas over sea-water.

This article follows my paper on raised feedpoint vertical SSB antennas for fibreglass boats. In this article, I look at an alternative; a horizontal dipole antenna which I will call an offset doublet and a Mk2 version, with a vertical component at the rear. We will continue to use the ATU matching device (often supplied by Icom) which will remove all the hassle of mono-banding and tuning. Marine SSB relies on a number of frequencies so an ATU to dial out the mismatch is vital.

Continue reading

Vertical Antennas for Marine SSB

This article discusses in layman’s terms how an antenna transmits its energy and the various factors that might affect its performance. The target audience is Foundation students and marine sailors since I discuss the positive impact of the sea as a ground, particularly those sailors with fibreglass boats who have vertical antennas mounted up high off the waterline. This debate started in the Yahoo Group, NordhavnDreamers.

Dipoles and Vertical Antennas

ecoflex-15

Coax showing centre-conductor and ground / braid surrounding

The energy from your transmitter is sent via its coaxial cable and connects to the “feedpoint” of your antenna which will radiate electromagnetic energy. Most modern transceivers expect to “see” a 50 ohm load at the point where the coax connects to the transmitter. It’s this reason why coax cable suited for transmissions is more often than not quoted as 50 ohm cable.

Antennas are a little bit like piano strings. If all the piano strings were set at the same tension, the longer strings would play a lower note and the shorter strings will play a higher note.

Continue reading

Kenwood TS-990s User Review

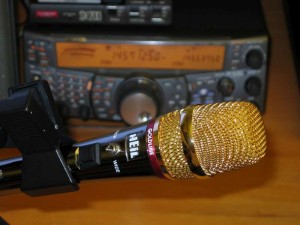
dsc_0228I finally took delivery of my TS990s in early January 2014 and it came with the latest firmware from the factory. First impressions, distilled into single words: massive, engineered, beautiful, functional, imposing, radio bling. But not a microphone in sight which I thought was pretty odd but they must have got their sums right, I would never had used a cheap mic on this wonderful radio anyway since I use a stick mic on a table boom (Heil Goldline) but it would have been good to check without making up a cable.

dsc_0231Everything about this rig is solid. My expectations had been managed by all the articles that I’ve read on the internet about the radio and I double checked the radio when I compared both the FTdx5000MP and the TS-990s at the RSGB convention in late 2013. For me, the TS-990s was the winner, although more expensive. The main reason for switching my allegiance from Yaesu was the size (I like very large radios), the in-built monitor and scope function, and particularly the fact that a single USB cable connects the rig to my WIndows 7 PC, effectively de-cluttering my MK2R+ SO2R system. I was fed up with all the wires everywhere. Continue reading

Splatter or Receiver Overload?

Some operators mistake what is actually their inadequate receiver circuits as “splatter”. Genuine splatter that causes annoying interference on the band is very rare. What is more regular is operators assuming that the products they are hearing is splatter. It’s probably not.

m0mcx-ts-2000-with-goldline

TS-2000 suffers with close-in strong stations

For years, I ran an FT1000MP at home and I would curse under my breath, those stations that slid up to me in a contest, just a kHz away and started calling CQ, particularly the 80m activity nights. I would hear that typical crackle and scratching sound which was louder than the station I was in QSO with. I would bail-out and find another frequency. I couldn’t believe these stations had the staying power to stick next to me since clearly they would be receiving the same crackle from me – as I did from them. Or did they? Something was odd.

Continue reading

Budget Tilt-Over mast from Barenco

(This article contains an animation)

barenco-special-screenshot(Note, this product is at the “enquiry” level, it is not a stock part from Barenco)

If you haven’t heard of them, then you should. Barenco make the finest brackets and supply other amazing stuff for the amateur radio hobby. Here’s Brian’s link:

http://www.barenco.co.uk/

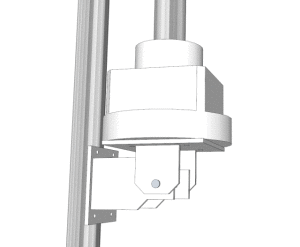
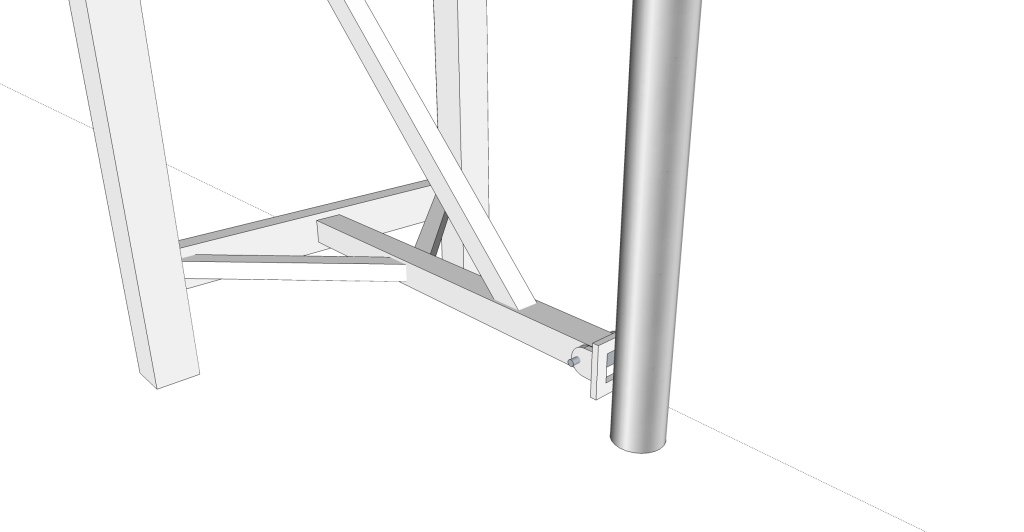
I dropped an email last month to Brian asking him for some custom work but explaining something in writing that will produce a piece of engineering can cause spurious results. I therefore used my new (free) toy, a 3D modelling program called SketchUp to show Brian what I was after.

Essentially, it’s an off-set, side-mount rotator bracket that is also tilt-over. Since the bottom of this mast will only be about 2.5 above the ground, I’ll easily be able to secure the rotator bearing, undo the bolts at the top and carefully lower the mast down with a 6:1 pulley set I have.

Here’s the walk-through as an animation:

Special Event Operating Procedures

IMG_6963

Callum, M0MCX

This note will be particularly beneficial to those who may be required to run a special event station either on the lower bands or maybe on VHF. These tips & tricks will also help you anywhere on the band, regardless of your circumstances.

Preface: There are a number of aspects that appeal to me in this hobby, fancy radios, interesting antennas and GREAT operating. I enjoy making my hobby more fulfilling by operating well, and I don’t just mean following my license conditions. I like to mimic great operators, those guys that sound clear, even under QRM and QSB, they mean well, they act professionally, like they’re in Mission Control during an Apollo Mission. They inspire their contacts to act professionally – even the Italians don’t scare them! Someday, I hope I might be half as good as them 🙂

Continue reading

6m Loop Fed Yagi Project

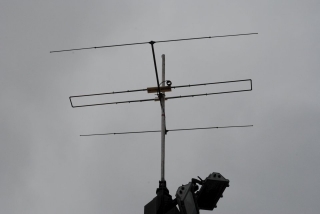
A few years ago, I bought a 6m yagi from Moonraker and James and I used it on one of our private field days. We found it difficult to get a great match but I thought I’d resurrect the project earlier this year to enter some random Saturday contest that was taking place on 6m.

Unfortunately, for love nor money, although I managed to assemble most of the bits, I couldn’t find the gamma match arrangement in all my Tesco boxes. I needed this because unfortunately the impedance of a three element yagi is well under 50 ohms so unless I went for just a two element beam, I would have to re-engineer things. I recall that a loop had a higher impedance, about 100 ohms. Using a closed loop system with a reflector and a director would bring the loop impedance down, probably by about half (according to the modelling) to achieve 50 ohms. I modelled it and things looked very promising. Wide bandwidth and pretty good gain.

Continue reading

Designing a Radio Ham Shack

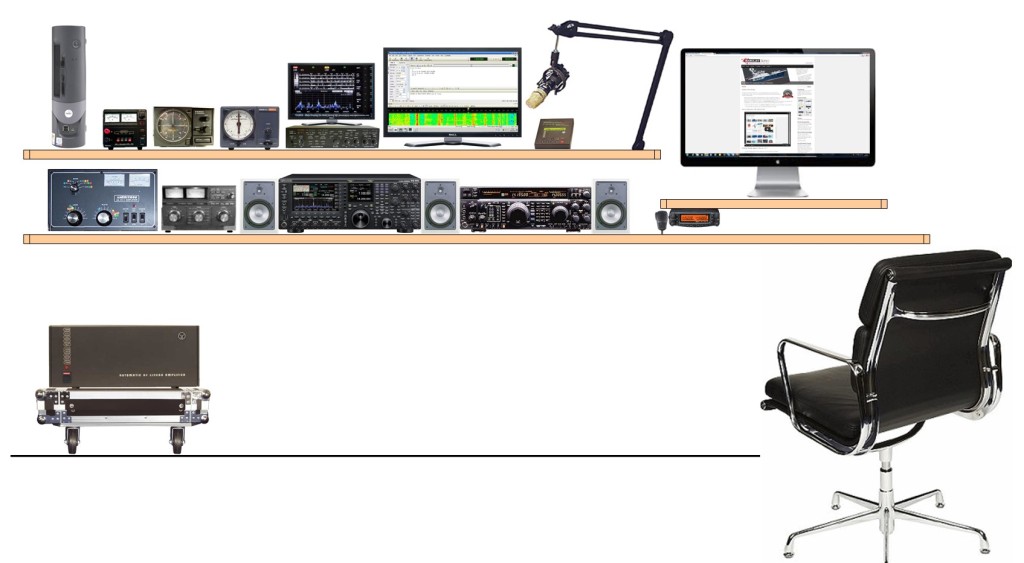
I can’t remember how many times I’ve moved my shack around. And when I do, it’s always wrong, it doesn’t look quite right and nothing fits where it should.

m0mcx shack redesign

Further, just when / if I do manage to get it right, I need to get to a particular piece of equipment that’s stuffed away perfectly on a shelf. I seem to spent more time dismantling the darned thing to get the piece out to either take to a field day or have it fixed.

Continue reading

511 QSOs – Cornwall DX-Fest Conclusion 2013

2 Weeks in Cornwall seemed to go in a flash but in between QSOs, I did manage to find time to repair my website and get it back and running again. I love documenting the fun and games I have whilst I enjoy the science of RF. I trust you enjoy it too.

cornwall qth

Firstly, thanks to everyone who gave me a QSO. I exclusively used a pair of verticals. Antenna #1 was the 40m vertical (actually 9.6m in length with 16 radials) which also gave me a 5/8th style antenna on 15m. Antenna #2 was the dual fed 20m and 10m verticals, similar to a fan dipole. More accurately I would call this a “nested” vertical.

I ventured onto 80m band for an hour but conditions were abysmal compared to 40m so you’ll see many of my QSOs were on my favorite band.

Continue reading

Frying antenna wire with QRO

RF Weld - Click to zoom

RF Weld – Click to zoom

In the process of testing out my 80m coil this morning to load up my 40m vertical, I pushed 400w AM up the antenna and the ACOM went into alarm, telling me the SWR had gone too high.

Upon investigation, I noticed that just at the top of the coil, as the D10 comms wire kinked around some insulation tape and started its travels vertically, the wire had welded apart.

I made a repair using extra heavy gauge copper to take the high high current and all seems well again.

Continue reading

Adding a loading coil to a 40m Vertical for 80m operation

80m Loading CoilA successful morning today to convert my 40m vertical to an 80m vertical by adding a loading coil that I can switch out manually by just unplugging it. Nice and simple.

It’s not a great SWR curve due to the loading coil but I achieved 1.8:1 SWR at 3.79 Mhz, ideal for DX.

For the techies who want the dimensions: I wound 24 and a half turns on a fibreglass 2 and a quarter inch fibreglass former. The length of the coil itself is 3.5 inches.

Continue reading

Tuning a vertical antenna with the ocean tide

cornwall qthHere’s a new one that you wouldn’t read in the books.

I’m seriously hammering the 40m band here in Cornwall and have tuned the vertical antenna so that the whole of 40m SSB is almost 1:1 swr, certainly from 7.05 through to 7.1Mhz. Over the last few days though, I’ve noticed that the tuning might change over a few hours to give me some serious SWR headaches. Enough to force me at one point to fold back the top of the element by 70cms.

It took me a while to track down what was happening but it turns out that when the tide is in, the vertical is effectively closer to the salt water ground and requires to be shorter than when the tide has been out for a while, long enough for the salt water to drain out the sand and reduce the salt water table by probably 15 to 20 feet or so.

Continue reading

Amateur Radio with low electrical noise

40m and 20m verticals

40m vertical (left) and 20m/10m Nested Vertical (right)

I’ve been running many pile-ups on 40m this week and I think half the reason is that I can hear so well because the electrical noise is almost non-existent. Of course, my TX is also pretty good because of the salt water too.

Working conditions; My “holiday” rig, Kenwood TS-2000, Heil Goldline, NC10 netbook running N1MM “DX” mode with a RigBlaster for voice keying and my Acom 2000 to loaf around on.

Continue reading

40m Quarter Wave Vertical, Cornwall

40m vertical

Quarter Wave Vertical 9.6m in length

I’ve tried many verticals and never had good results APART from this one.

This is a 9.6m long fishing pole and the length of radiator is the same. I fixed 16 x 10m long radials to an insulator that I had lying around. I would have preferred this to have been aluminium but I already had three of these. Most of these bits were salvaged from the three-element vertical array with raised verticals that James and I made back in 2009. Each bolt was bonded together with some copper wire that is out of shot, underneath the insulator and the radials were politely scattered in an approximate radial system on the ground. SWR is 1.0:1 according to my electronic controller on the Acom 2000.

The results have been amazing but I do realise that I had two things on my side; location by the sea and almost no electrical noise. Bliss.

As I write this, I’ve worked 48 DX entities over about 7 hours operating time on 40m. Quite incredible. I’m a convert.

Nested Quarter Wave Vertical Antenna 20m and 10m

20m 10m verticalWith my recent success at building fan dipoles that are more “nested” than “fan”, I saw no reason why I couldn’t put up more than one element on my 20m band vertical to achieve a match on 10m. I ran up a 2.4m length of D10 comms wire up the side of the pole, around 2 inches away from the 20m quarter wave element. After trimming a few centimeters here and there, it tuned it at 1.3:1 SWR and all was well.

To make sure everything really was good, I applied a QRO carrier and watched in amazement as the SWR hovered for a few seconds before moving up and down and finally going off the scale with the Acom shutting down with an alarm (what a great amp that is!).

It took a while to track this down but it turns out the D10 military comms wire had melted at the guying point about half way up the 10m vertical element. I had tensioned it around one of the bolts on the steel three-way guy point to stop it flapping around and it decided to try melt the insulation and finally and weld itself onto it before blowing itself apart. The joys of QRO.

The drivel written about antennas

Typical NVIS Far Field PlotI check into the HamAntennas Yahoo Group fairly often and it occurs to me that collectively, there seems to be a lot of smoke and mirrors surrounding the design of low-band antennas and everyone seems to forget the basic principles, that low-to-the-ground antennas will form bubbles of RF above you. We call them NVIS or Cloud Burner antennas. The graphic is a plot of my home-brew 40m loop in the garden from MMANA. It’s 25 feet above the ground (which is exactly the same far-field plot as an 80m loop at 50 feet). Clearly it’s going to work well at what it’s designed for. Up to about 1,500 miles. In practice, it conforms precisely to my software plot.

Continue reading

Under the hood, “Fan Dipoles”

10m and 15m nested dipole

10m and 15m nested dipole

Last year, with the assistance of Stu, M0NYP, I built a fan dipole out of D10 military telecoms wire for 80m, 40m and 20m for club field days. There was a fair amount of gap between each element, probably about 5 to 7 degrees becasue that’s what I thought you should do. For those people who came to either the Avoncroft Mills on the Air day, or the SSB Field Day, will recall the antenna. However, we lacked 15m and 10m though which I found a disappointment.

To become “all band”, I considered adding more elements to the Field Day antenna but experience has taught me that multi-band wire dipoles have a tendency to get tangled in the field. Adding more elements would probably just mean more tangles = less fun. In a Field Day situation, that’s a frustrating day out.

Continue reading

Power Over Ethernet – Buffalo G54 – WiFi Antenna

POEI found my old article recently regarding my home-brew Power Over Ethernet Project. James and will shortly be putting internet at the Scout Hut around one mile away and having my router as close to the antennas as possible will be mandatory. Here’s an old project that I wrote up in 2009:

Using very high quality coax from my vertical antenna to a router in the shack is a very expensive option due to the very high losses at 2.4 GHz. We could use Ecoflex 15, but at £6 per meter and £9 for a connector, it’s a bit rich for a kids experiement.

Continue reading

How to make a loop antenna for 40m and 80m bands

SkyloopI’ve been an addict of full wave (and partial wave) loops since realising many years ago that in comparison to a dipole, you get more bang for your buck if you build a loop – certainly you get more copper in the air – and loops are resonant on EVERY harmonic so a 40m loop will be resonant on 20, 15m and 10m. A multi-band antenna for peanuts. They will receive better too, so for a housing estate, these are mandatory.

When I first started out with this hobby, I had a half-sized G5RV and I genuinely thought that I’d never get onto the 80 meter band. Within 18 months, I had worked out that you can build a loop of a wavelength in circumference (give or take a percent or so) and feed it directly with coax (and a 4:1 balun). Even better was the idea of putting loading coils in each corner of a square loop and you could lower the resonant frequency by a substantial amount.

Continue reading

Footnote: 40m and 80m skyloops for your back garden

You may have a smallish back garden like me; 10m deep and 14m wide. Your 40m loop (that’s really 40m [or so] all the way around) will resonate on the 40, 20, 15 and 10m bands. Mine is only about 20 feet off the ground, around gutter height. Its not quite square but the far side and the near side are completely different lengths to make it nearly a triangle. Not quite. I have coax to the feedpoint and a cheap 4:1 balun there. With some trimming on a sunny day, you can make it work on all the amateuir bands – and I even used it on 2m once!

My 80m loop was (and still is) square at about 15m per side which is actually too small for the 80m band. My 80m loop is actually 60m all the way around. To make it “bigger”, I added 4 x loading coils into each corner. These coils are 2 inch in diameter, 6 inches long and approximately 30 turns on each coil. With some farting about, you can easily make it tune either the CW or the SSB portion of the band. If you have a tuner, you’ll dial that out easily anyway, particularly at lower power: 400 watts and under. The 80m loop happens to work on 30m band too. Just a fluke. Great for digital.

Continue reading

Microham MK2R+ Installation

I’m pleased to report that James (M0YOM) has successfully installed our Microham MK2R+ recently. This means that we can now use the FT1000MP *and* the TS2000 at the same time, ideal for SO2R.

This means that whilst I’m CQ on 40m band, I might be listening up on 20m, waiting for the band to open. Just hitting the appropriate footswitch would, in an instant, switch transmit over to the 20m band and allow me to QSO up there (and of course, carry on listing on 40m band at the same time).

In fairness, we’ll rarely use the station like this. Frankly, it’s more of a convenience of having just one microphone, one computer logger with an integrated two-radio setup and full digital modes from 160m to 70cms.

Cheers James!

CQ WPX 2010 Amateur Radio Film

I finally got around to doing the final edit for the CQ WPX Radiosport Contest. Please don’t take the film too seriously, I was really poking fun at us! However it turned out quite pleasant in the end although the title sequence at the end is a bit of an overkill 🙂

Give it a peek and comment accordingly.

*Note: The WPX contest is based on an award offered by CQ Magazine for working all prefixes. Held on the last weekend of March (SSB) and May (CW), the contest draws thousands of entries from around the world. Many stations erect large radio aerials just for the competition. Yaesu and Icom radios compete to be the radios of choice amongst the top amateur radio stations.

73, C.

160m RSGB Club Calls Contest 2009

One mistake (apart from entering) was going S02R for a few moments and sliding up on the 2nd VFO to the fellow on 1950. I carried on CQing until my off times coincided with his off times before giving him a blast.

Woops! I bluffed my through the contact since he took rather a long time in repeating everything and I nearly lost my run freq, so half way through his over I started CQing again – and still managed to work out the report! I was logging both him on 1950 and my own contact on 1947.20! I must have sounded deaf to the poor fellow who I kept asking strange question to on my own frequency, to piece together the report at the same time as working the chap on 1950, “Did you say Member or Club”? and hoping for short, to the point answer.

Very funny, but I stopped that pretty quickly.

40m Vertical Parasitic Array Antenna Part III

Vertical Array 40 meters

We finally built the 40m array on Saturday and conducted a full test on Saturday night, in preparation for CQWW this weekend coming (24th/25th Oct 2009). The good news is that signals bearly audiable on 40m on our standard Mega-Loop came up a few db on the array, to around 5 and 7.

The front to back ratio could be higher. Germans were crawling all over us, working Worked All Germany contest which was a good test, but it did hamper our out-and-out gain tests to US. Many of them probably switching off and saving their energy for next weekend. The modelling we went for gave us maximum gain at 10 degrees take-off. We could have gone for slightly less low-angle gain and instead aimed for a very high front-to-back ratio dialing in up to -15dB off the back. As it is, this current antenna only gives us around -6 db gain off the back. There are some benefits though, like working VK “off the back of the beam”, which I’ve never said before on 40m. Great fun.

Essentially, we have the gain of a non-steerable 4-square array so we should have fun into the top end of South America as well as all of North America, right up to Vancouver and Alaska.The proof of the pudding though, is this weekend and needing 40m to work all through the night, from 7 at night through to 7 in the morning – possibly more. This antenna needs to give us 12 hours out of each 24 hour slot, a must for a Multi-Two entry. Station #2 will have 160m, 80m and 20m to play with all night.

Remember to dial your logging program to update GetScores.org. A live scoreboard is hilarious fun for teams and will keep you on your toes all weekend.

Good luck and have a blast.

C.

40m 3 Element Vertical Yagi Antenna – Part II

We’ve built some large antennas before but never this big; a 3 element 40m vertical array with raised radials. We made it a raised radial system for a) a quick match to 50 ohms and b) it needs to be a “field” system. We can’t permanently leave our antennas in a public park.

First, you need to get into the scaling to believe it: Take a 6 meter scaffold pole of 48mm diameter (21 feet x 2 inch). Stick it upright on the ground and sleeve inside it, an inch and a half (30mm?) 4 meter (13 feet) pole. On top of this, sleeve a 10 meter (30 foot) fishing pole blank.

Sleeved Scaffold Pole AntennaYou will now have a structure that is effectively 20 meters tall (65 feet). Now then, the fishing pole blank will become the vertical part of an antenna which happens to be a quarter wave for 40 meter band. Being a raised antenna, we need radials and since we’re closer to the ground than a wavelength, we need a more than the traditional two radials to counteract the ground losses. We decided that 8 x radials will be about as good as 60 or so regular ground mounted radials. Do we have the maths right? We think so.

The radials have been modelled at 10 meters length each since they are essentially part of the circuit and will have currently on them, hence the quarter wave dimension. They slope to the ground at approximately 45 degrees. We need to attach some paracord to the ends of the radials and extend them down a further 7 meters before we finally hit the ground. Imagine how far away you are now from the original scaffold pole? I can tell you, it’s 13 meters (42 feet). The diameter of just one of these then spans 26 meters (84 feet) and we have three laced together at a spacing of 10 meters each (three element array).

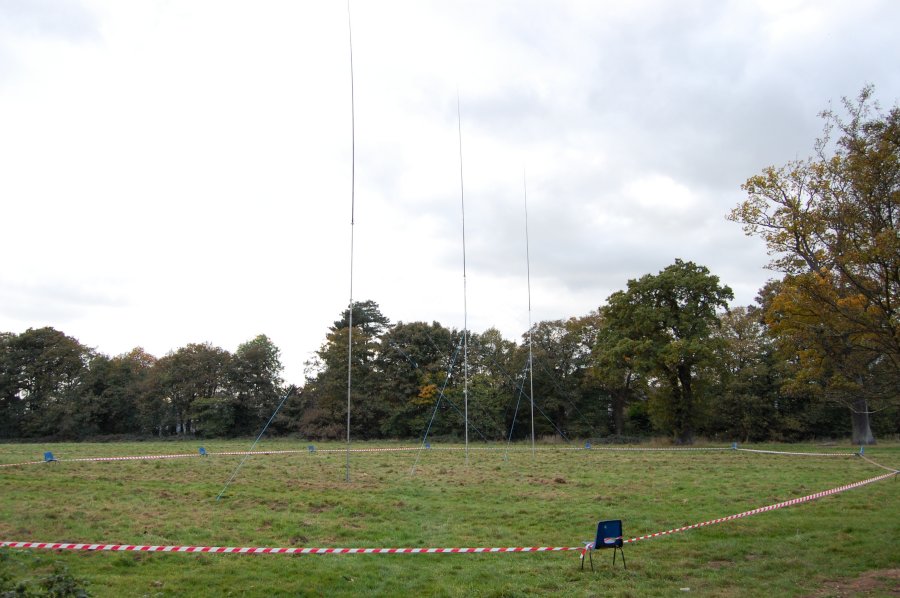
40m Radial System Today, we did all the hard engineering and measured out all the bits and pieces, ready for a trial the week before CQWW. James and I laughed at the thought of how big this monster really is – and then wondered if it actually fit inside the park so as not to distrupt the walklers? Thank goodness we checked. For those of you unlucky enough to have been to our Scout Hut, you will know that when leaving our front doors, you will notice an oak tree in the distance that houses one corner of our mega-loop. James and I measured from the grass outside the doors to the last radial and we were only about 5 meters from the oak tree. Bloody hell!

We’ve had to re-engineer where we had planned to fit this monster into the park since it has a total wing-span of 52 meters (170 feet).
A picture tells a thousand words, so feel free to check the pics.

40m 3 Element Vertical Yagi Antenna

We’re putting together a Multi-Two entry for CQWW this year and it’s pretty clear from our experience with CQWPX that we not only need gain to the US on 40m but we need excellent front-to-back ratio. A new antenna was required.
A two element yagi was considered but we don’t have a tower for such a beast. We did though have various 10m fishing rod blanks and a load of aluminium scaffolding tubes. With some analysis, we feel we can build a high gain array utilising Yagi’s principles of a driven element in the middle and a reflector and a director element front and back.

Original modelling was conducted with MMANA however, the team has recently started to convert to modellilng with NEC2. James’s NEC model confirmed my 5db gain using MMANA at 10 degree take-off angle.

40m Three Element Vertical      3d Far Field Vertical Yagi     40m Far Field

The feedpoint for each element will be at 9 meters above ground using 6 meter scaffold pole sleeved with a 4 meter inch and a half steel pole. The 10m Sky Blue Leisure flag poles sleeve to the inch and a half steel poles. I’ll take some pictures tomorrow of the build.
Make no mistake, these will be monsters with 8 raised radials per element. Today, I made the insulated guying blocks for the radials. This is going to wipe the floor!

Watch this space.

Region 1 Field Day 2009

M0XXT SSB Field Day 2009Field days seem to whoosh by in a seamless tirade of bodily abuse that starts in the balls of the feet, grows through your hands and wind blown cheeks before reminding you that you are starving hungry and you’ve only just taken over the driving seat.

A very dissapointed 1012s QSO this  year and we still can’t work out why we lost ground so fast with the other leading stations, even on 80m where we should have held our own. Certainly having a tribander at only 35 feet is a hell of a penalty to have to suffer every year, but why our 40m and 80m runs were not producing the numbers that the other high-flying entrants were managing? I just don’t know. High probably does mean might. Last year’s 1,000 foot entry was very different on the higher bands to this year. Mostly, we were firing right through a heavy forest. I wonder how much attenuation there is in 500 yards of dense oak trees that are about 80 feet tall? Well, you get my drift.

Filtering this year was amazing. We used a second rig as a dedicated 2nd receiver using James’s new Band Pass Filters, made to Bob Henderson’s designs and we had negligible breakthrough. I can’t wait to use the new permanent multi-two station when we have the stub filters in place too.

Anyway, although I’m gutted that we probably didn’t even make the top three, we still had a good time and achieved some learnings too. Contesting for me is about three things, learning, competing or having fun. Ideally, all those things. This year I had all of them but not at the same time. Knowing that we were beaten within 2 hours of the kick off made me push extremely hard, but we just couldn’t catch the leaders. Grrr.

Oh well, next year we’ll be back, stronger, cleverer and with a better strategy.

C.

Huawei E220 External Antenna Modification

Modern USB Data Sticks don’t seem to come with external antenna jacks these days. This is a real shame for geeks like me who want better signals and are prepared to procure external antennas to ensure high quality signals.

This project is to ensure that we can have 24 x 7 comms on the boat this summer without resorting to hanging USB modems out of portholes. Metal, as most people know, shields RF extremely well so external antennas are the only way to go. I have already made the necessary internal IT mods to the boat to ensure we have connectivity with a new Dell machine and a wireless router, shared on one of the ethernet ports. A second ethernet card connects to the router as a client to put the Dell back on the corrrect subnet as the rest of the wireless laptops (which are on the “wrong” side of the router). A spin off to all this is that our Orange Blackberry’s will connect to the router, delivering a UMA connection meaning that we will have at least four devices connected internally. Voice calls will be almost impossible via UMA unless we have a very smart connection.

Learning from a mutual friend of mine currently travelling from Alaska to Japan on his Nordhavn, we will share out our WiFi connection with our convoy and friends who we will meet along the way. And why not 🙂
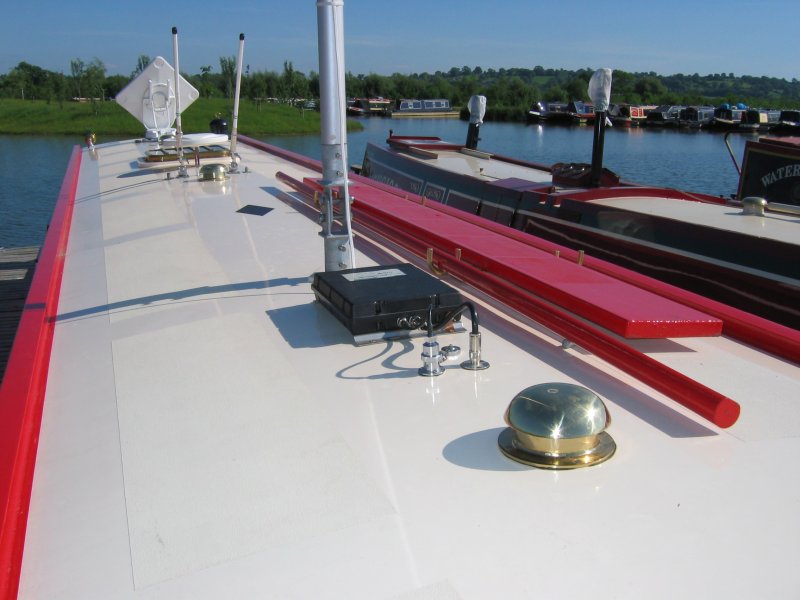
Cellular and WiFi marine antennasOf course, I already have a good 2.4Ghz antenna for the reception of WiFi signals and this will remain connected to the Dell’s WiFi card if (and when) we manage to secure a good quality marina WiFi signal but the USB stick will supply almost as good as home broadband, depending on availability. Some people will know that I have a deep knowledge of WiFi security auditing and I will, as a matter of course “test” out the security of most of the WiFi hotspots we happen to come across as part of my learnings. And if you believe that, you’ll believe anything.

Anyway, I digress. What I needed was the facility to have good signal strength to the Huawei E220, hence this successful antenna mod.

If you came here from Google, you will want to know the ins-and-outs. I can tell you this is a genuinely very easy mod if you have prepared all your tools and have an hour to play with. Like all modification projects, the key is not to rush.

First, lever off the protective branded cover. I used a sharp knife to start breaking the sticky seal. Be carefull you don’t cut yourself. It comes off quite easily with a sort of unsticking sound. Ignore the little tab at one end, it’s only a positional tab and doesn’t do anything mechanical.

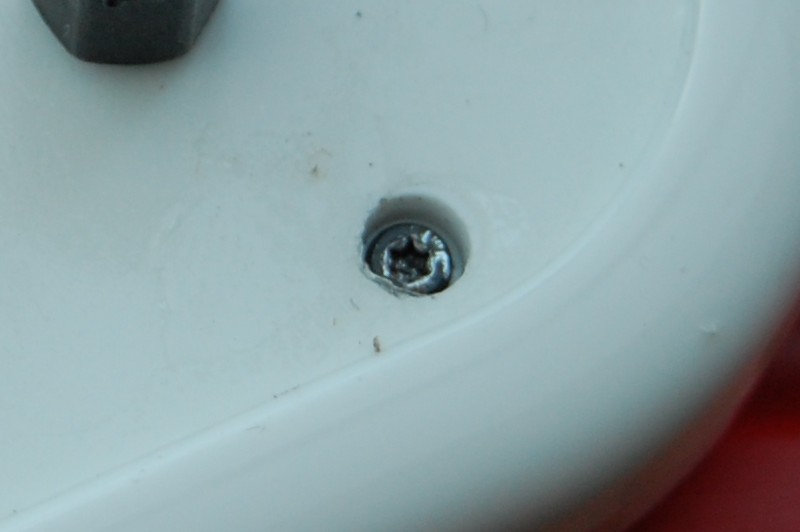
Next, observe the very small Torx style screw that holds the covers together. Initially, you might find they are covered in a sticky paper washer affair, this is just the remnants of the branded cover. Pick them out with a sharp knife.

Now, even my very tiny, small torx screwdriver didn’t manage to uncrew these torx screws, I reverted to using a tiny jewellers screwdriver which just managed to catch the sides of the Torx screw head and I carefully unscrewed it. I have read that some people have just snapped the case open but I wanted to keep it all in one piece. If you can find a teeny-weeny screwdriver, it is worth trying to get this out.

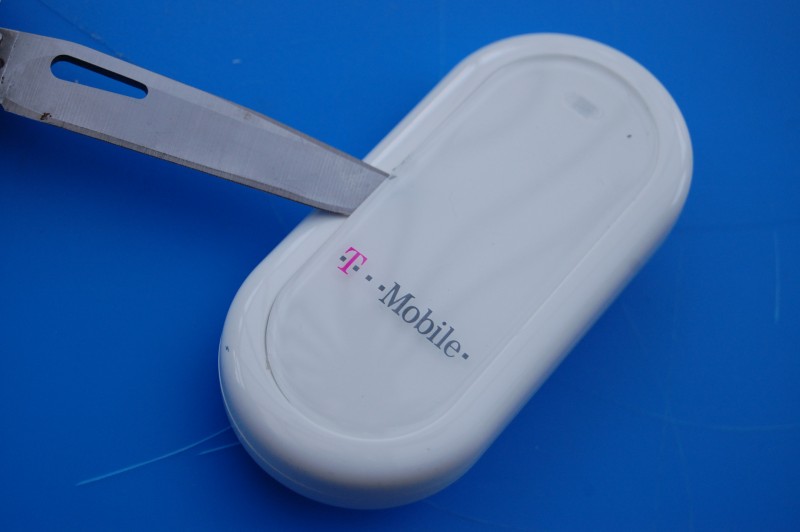
E220 Antenna Modification E220 Antenna Modification E220 Antenna Modification

Next, I took out the SIM card and put a very large screwdriver blade inside the opening and started to snap all the mechanical catches apart. Within a few seconds, I had this apart – it is not difficult. Just be careful and work steadily. You don’t need to be strong, just work slowly.

You will see when the device is apart, a weird antanna located opposite the USB connector built around some clear perspex type material. Again, this comes off with the same tiny screwdriver you managed to open the case with via the two torx screws each side of the antenna. I suppose if you had to, you could break this antenna off to do this mod but frankly, if you are a technical sort of person, you should have a teeny screwdriver capable of fitting this torx screw. They came out pretty easily.
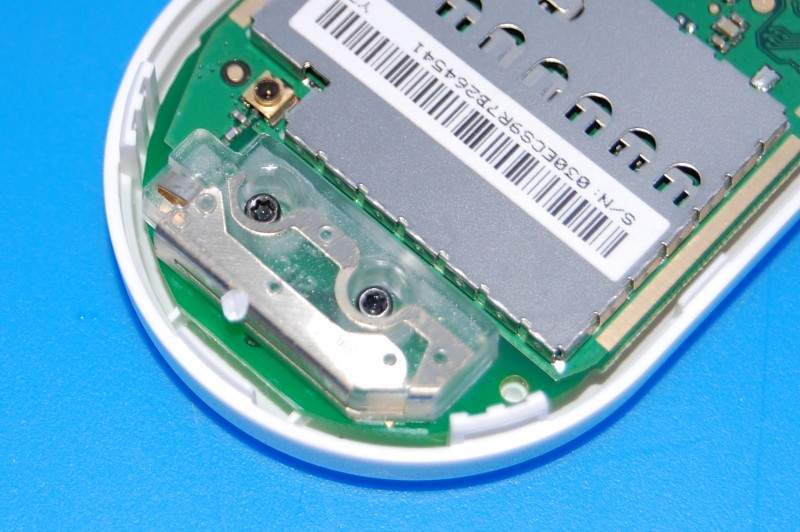
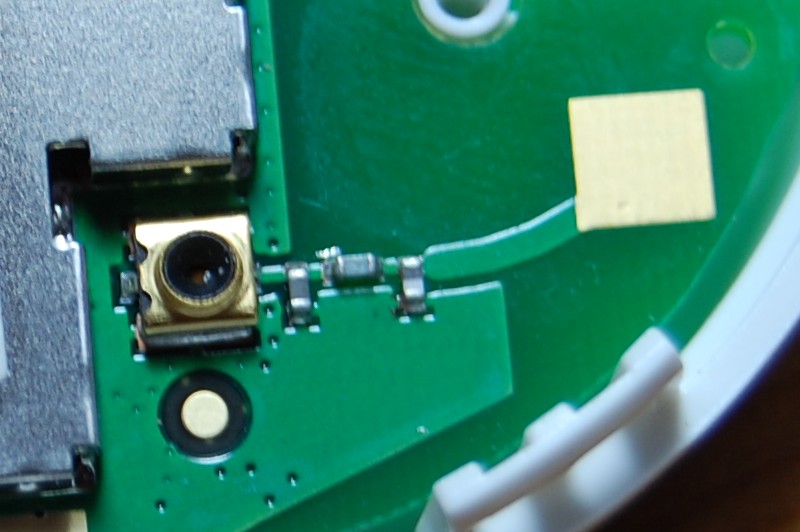
E220 Antenna Modification E220 Antenna Modification E220 Antenna Modification

For the technical antenna people reading this, I found this antenna really cute. A quarter-wave at 1.9Ghz is around 4cms which is precisely how big the main element is however there seems to be a matching stub or similar very close to the main element. To start with, I thought this was a separate antenna similar to a fan dipole but the jury’s out since this would mean it also operates at around 4 Ghz, way off I think. Upon reflection, the design seems to be a folded monopole fed against the chasis ground – although the smaller antenna next to the main element is a bit weird. If you know how this works, I’d be keen to understand. Please let me know. The only thing I didn’t work out is the soldered ground I used. Is the ground tag that I soldered actually connected to the chassis ground? I don’t know. Perhaps I need to make some checks. If you know, please contact me with details.

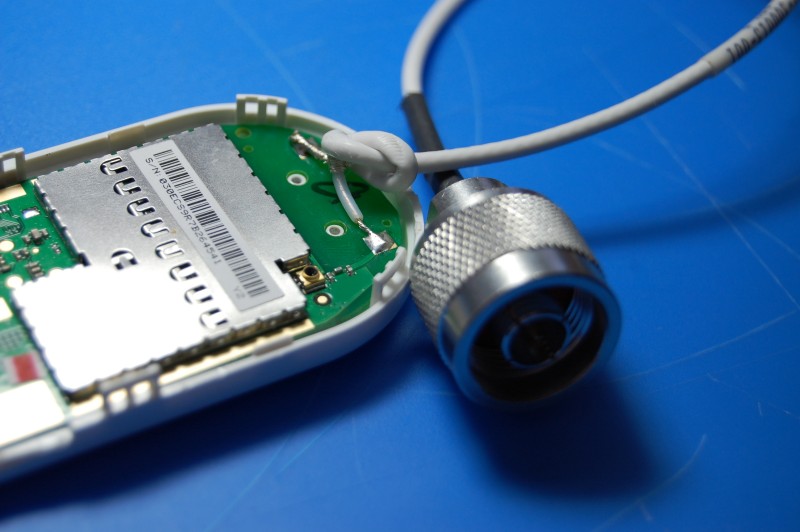
Soldering the RG174 was pretty easy and after I had created a cable exit route with a small heated screwdriver that melted the plastic, everything came together. In the end, I didn’t use the torx screw to put it back together. Instead I just used the clips which will mean if I have to maintain this in the future, life will be a little easier.
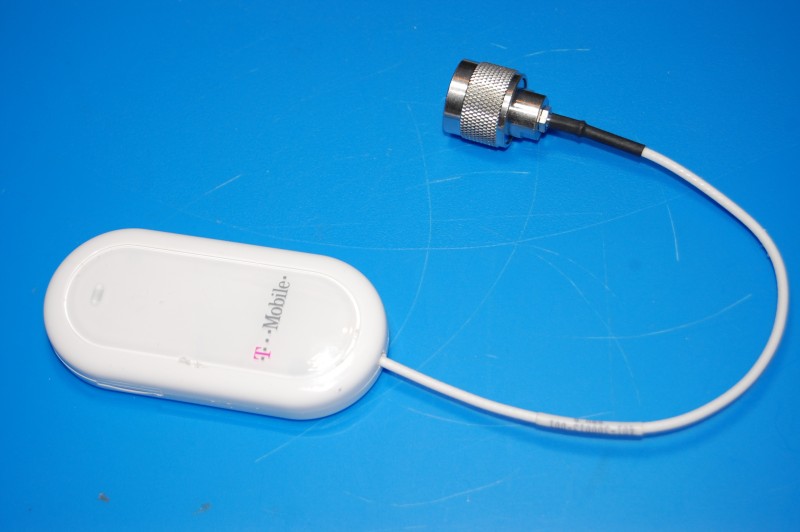
E220 Antenna Modification

The outcome is good although I have not used this on the right frequency antenna yet. On the boat, I have a dual band cellular antenna which is 60cms long and will display enormous gain (considering a quarter wave is 4 cms). Working through HSDPA specs, I will achieve almost a perfect match with my transmit signal at or around 1.9Ghz and my receive signal, at just under 2.2Ghz should be a fairly easy trip (HSDPA had uplink and downlink frequencies).

My cellular antenna will therefore be transmitting perfectly although receive may be slightly attenuated due to the narrow bandwidth these cellular antennas display.

However, here’s the worst case scenario: Tonight, I used a WiFi antenna as a benchmark and achieved 2 bars using the T Mobile (Huawei provided) software. Considering that a 2.4Ghz antenna is a terrible match, I am happy that this will perform as planned on the boat.

Before I sign off, I hear you ask; “Where did you get the RG174 and matching N-Type”? Seemples; I bought an SMA to N-Type pigtail and cut the SMA off.

All in all, a successful project. I’m very pleased.

(2 days later: I’m currently on the boat connected via this external antenna pigtail to the dual-band cellular antenna, connected at 3.6Mbps. I’m very pleased!)

C.
More on Narrowboat Design

(This post aimed at our US friends).

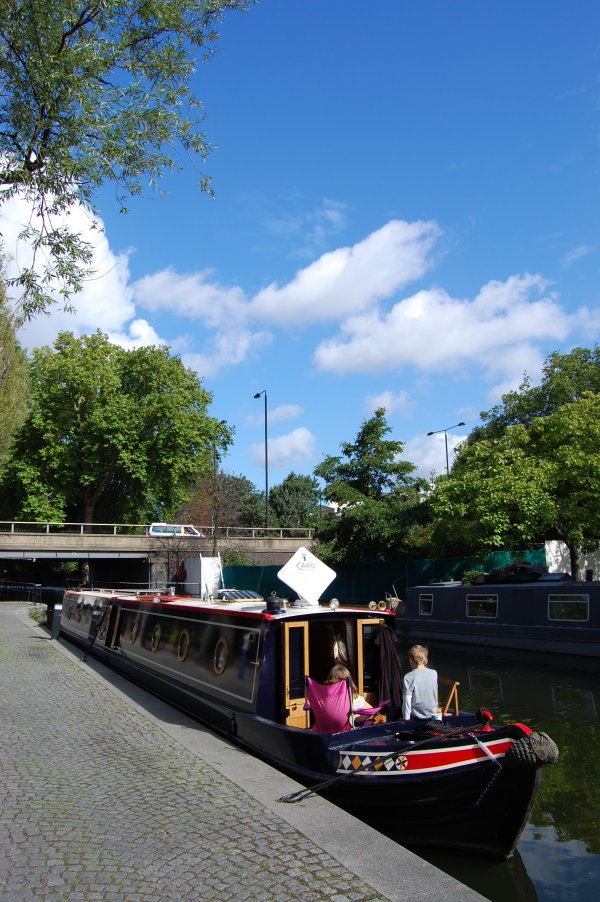
NarrowboatI get an email at about once a week from various members of the NordhavnDreamers group asking me more about our narrowboat which we use on the Inland Waterways of the UK. I find myself repeating myself every couple of weeks, so perhaps a high-quality post here will put your taste buds at ease.
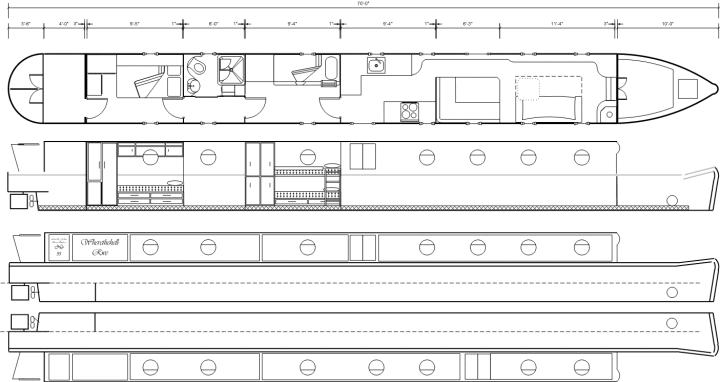


Our boat conforms to a 350 year-old 6 foot 10 inch UK canal barge spec. Actually, they were originally 7 feet wide but some locks have subsided by an inch or so over the last couple of hundred years and a 6 foot 10 inch spec has now been agreed.

History is here: http://en.wikipedia.org/wiki/History_of_the_British_canal_system

We have a 50 hp Beta Marine engine driving an 18 inch three blade prop via a 2:1 reduction gearbox on a 70 foot 23 ton boat. It’s made of mild steel, built on half-inch base lowering to a quarter inch thick on the top deck. The engine supplies 12v to our 4 x 110 ah house batteries and one starter battery via a pair of alternators and we also have something called “Travel Power” which is a bloody great big belt-drive alternator, supplying a 5kW 240v mains device at the flick of a switch (again off the main engine). When I flick it on, I normally have to hit the throttle a whisker to compensate. The throttle is “analogue”. We don’t have a wing or a generator but no switch = no Travel Power (and when it’s on, it’s clearly sucking up power from the engine). This is supplemented by a 3kW Victron inverter. This means, we can have the kettle and toaster on in the mornings when I’m driving along and it also means that the inverter thinks it’s seeing Shore Power and drives the charging flat out. I can achieve a battery “float” after about 12 hours solid charging which lasts us about 18 hours when we’re “on the hook” (mostly fridge, freezer, Sat and TVs). Washing machine use is restricted to when we’re moving and Wendy checks I have the Travel Power “on”. We don’t have an anchor (well, we do but only for river emergencies), we just stop whenever we feel like it and enjoy the view, the wildlife, whatever. Of course, sometimes we can stop right in city centres.

The sound proofing is nothing like a Nordhavn, there’s just an inch thick ply panel between the engine and the master bedroom so it makes a bit of a racket. We have an 8hp electric bow thruster which isn’t proportional but it hangs off a really massive battery (I forget the spec) and it’s very loud with the steel sounding like a bunch of cymbals going off. I can reverse quite easily by using the bow thruster as a steering device, as long as I don’t go too quickly. Apparently the bow thrusters should not be used for more than 2 minutes in any hour. Very occasionally, I think I might be getting near the thermal but so far, never have (does it work..? More questions than answers as usual). I don’t have staged throttle controls, I’m either in neutral or I’m revving the engine for power (or in gear too). I would love a two or three stage idle, as per Ken’s (and David’s) 68, but eventually you have to realise that we’re only doing 4 knots here and the shore is normally within about 12 feet(!), so not much can normally go wrong bar ones ego!

Narrowboats, by their very nature have a number of compromises. For instance, the master bed is only a 4 foot 9 inches wide. This means that we get real cosy watching late-night TV or I sleep in the saloon on an extra large double bed pull-down thingy (she kicks me when I start snoring!). 70 feet long is the absolute maximum you can have on the Midlands and Southern Canal systems. Up “north”, they have wide but dumpy locks. This means that to travel absolutely everywhere in the UK, you need a 58 foot regular-width narrowboat. This is too small for us since we have 2 kids, hence the bunkroom with playstations etc and lots of toys (Ken and John would certainly approve!).

Heating is by a) diesel (furnace) Webasto making hot water which is pumped around a skirting board radiator system. Waste engine heat is dumped over the side on a keel cooling section of the hull. I’m currently talking to the yard to salvage the waste heat and dump it back into the living space in the winter (complimenting the Webasto) since it’s pretty silly to dump heat on the one hand and make heat on the other. B) We also have a couple of electric heaters since we have lots of electricity we can use if required (a novelty on UK canal barges by the way). C) We have a log burner. I’ll often stop the boat in the winter by a large oak tree and salvage some wonderful seasoned dry oak which burns long and hot. Condensation in English narrowboats though is a bit of a problem. The portholes, for instance, do not have a thermal barrier between the outside of the brass and the inside. The consequence is that it will act like a cold beer, water will collect and drip. The only way out this problem (and many boat owners know) is to open all the windows and let the heat out! I vicious circle. However, I’m sure I could have paid even more and gotten around this issue with expensive windows, but we only use the boat in the winter for maybe four or five days so it’s really a non-issue.. Maybe our MkII boat will be better (don’t they say that you always have three boats before you get the spec just “right”..?).

We’ve made a few alterations since the main photo-shoot (the kids bunk room is much better now), but it’s still fitted out in the same European and American oak veneer. Apparently over the next 20 years, this wood will darken. Oak-with-narrowboats are very customary in the UK and it’s difficult to get builders to consider anything else.

The helm is outside, on the stern and we have a long brass tiller extension.

Sorry for such a long post.

Cheers,

C.

Narrowboat Design

A couple of years ago, I designed a narrowboat using Visio, down to the inch. Visio is cooller than you imagine and can be used like AutoCad as a 2d drawing tool (although AutoCad can do much more). I designed many layouts until I came across the standard called the “floating cottage” design. I had this design made for us. In the UK, narrowboats are only 6 feet 10 inches wide, however it’s amazing how much you can squeeze in.

Narrowboat Design

My friends in the USA can’t imagine what it’s like to travel on the UKs inland waterways where everything was originally designed for a 7 foot width. Canal travelling in the UK is a sociable activity and we meet lots of people every day. Often the locks are double width (14 feet) which means we will share a lock with another boat and their crew. Locks are often in “flights” which means we’ll get a few in a row. The ladies tend to work the lock paddles and gates (with the kids) whilst the men tend to stand on the back of their boats and talk turkey to each other.

I am amazed at how detailed some men can talk about the differences between such esoteric nonsense technical drivel. Many are consumed with amazement at all my antennas. Narrowboaters haven’t worked out yet that they can improve their cellphone or wifi with an external marine-grade antenna.

At the end of the day, the family all comes back together and we share a bottle of wine and discuss all the people we’ve met that day. It is very amusing.

Of course, we also get lots of onlookers. They are called “gongoozlers”. These onlookers can be very funny and they ask lots of questions. Many think we might live on the boat permanently and that we’re some kind of pre-historic or romantic throwback to the canal trade. Others think we’ve hired the boat for a day out. Many are very envious of the laid-back life-style of the canal boat holiday feel. Even funnier, some think that my 28 foot HF SSB antenna (ham vertical antenna) is a sail-mast. Great fun!

C.
Narrowboat Design

MegaLoop Antenna

XXT Meage LoopI’m currently writing an article outlining the characteristics of the Mega Loop antenna we use for Dorridge Scouts. If you would like a preview of this white-paper, please let me know.
The XXT Mega Loop is the name given for the application of a horizontally mounted delta-loop that has known gain dependant on wavelength size and height above ground.

At quarter wavelength above ground and above, Mega-Loops start exhibiting gain that is proportional to its wavelength and height. A whole series of articles is currently being written by the author, however for the time being, these few articles may help you determine how we operate the Mega-Loop at Dorridge Scout Group HQ.

Firing supports over trees:

The 160m Loop

How to make an electric fence for chickens

A number of regular readers have been wondering when my next update was to be uploaded. Sorry guys, I’ve been snowed under, mainly with the arrival of four chickens. This is Wendy’s new pet project to deliver about 1,200 fresh eggs every year. I’ve no idea how we will manage chickens whilst we’re on the boat other than the fact that there’s a place near Tamworth where you can take your chickens and put them “on holiday”. Boarding for chickens! Whatever next.

To keep them safe, I have built a one-meter (three foot) fence out of 2×2 wooden postswith 2 inch square galvanised live-stock wire. The chicken coop (house?) was made from a small, single bicycle shed from B&Q (home-improvement store to my US friends!) at a deal price of £83. A few sections of spare timber later and the whole things was a tidy chicken house complete with a fold-down rampart, a-la-English Castle style. Very neat.

The first night, looking for somewhere to bed down for the night, the chickens flew over the fence! A few minutes later and after much laughter, we had ushered them into their new home successfully, however the second night they did the same. By the fourth night, Wendy was becoming slightly impatient since she just wanted them to go back into their little house without prompting. I mean, how the hell are we to get someone to baby-sit these creatures if every bloody night, they have to round the blighters up off the lawn?

Electric Fence EnergiserTechnology came to the rescue. I found on ebay a most excellent toy, a 12 volt electric fence energiser that delivers 1,200 volts in 1 second intervals as well as an instant shock the moment you touch it. All I had to do was design the fence so that only the top was electrified (live). This was slightly complex since to make any sort of circuit, one needs a live and an earth. I ran a new earth line right across the top of the fence posts as the earth and then just above that (about an inch), I ran a clean live wire from the energiser, insulated from earth. Bottom line is that tonight, they finally all went into the house, but not before they had most enthusiastic sing-along as they tried in turn to do their usual trick of flying (jump-flapping?) up to the fence. Every second, the energiser blasted out a little wiggle of electricity and each time, the chicken’s feet got a little blast and they squawked (loudly) before jumping back down to the ground. Well, in the main that’s what happened but two of the birds jumped down wrong side, but we’ve “cured” them without resorting to 6-foot fencing which would look out of place in out trim and tidy English lawn.
C.

Easter 2009 Narrowboat Trip

Stratford Upon Avon Canal MapWith the kids having a couple of weeks off, we thought up a new trip and ventured from Calcutts to Stratford. We didn’t make it all the way back and have dropped the boat down by Knowle locks for a few days whilst I work out when I’m going to take it “home”.
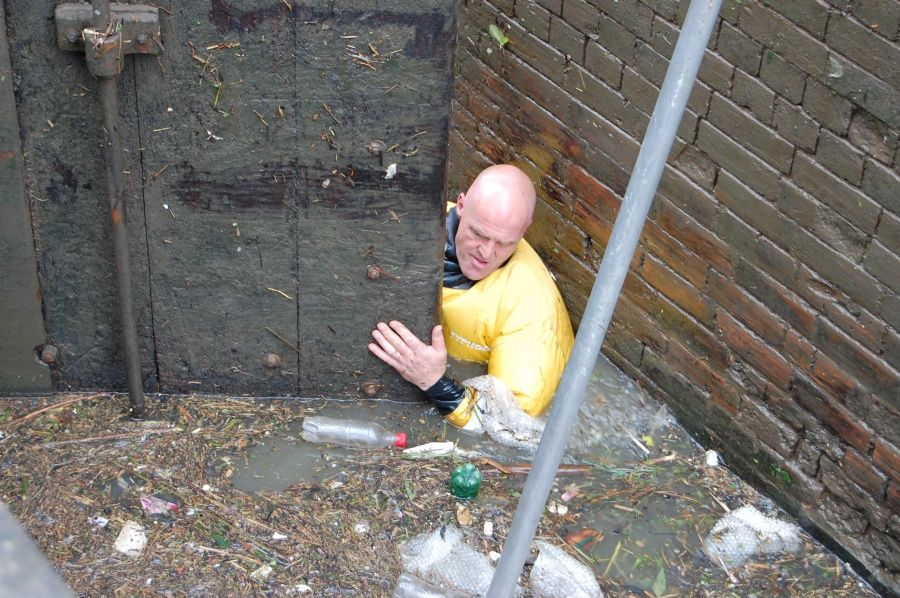
The weather was pretty kind to us, managing to rain mostly at night. When the sun did come out, we had fluffy white clouds and large gaps of blue sky. A very English weather for a very English part of the countryside. It must have been relatively sunny since I’ve clearly caught the sun on my face. I have a healthy glow without the radiation treatment that they get “down under” when exposing bare skin to sunshine.

We managed to squeeze in three main meals at three different well-known canal pubs in the first three days of the tip. All come recommended; The Waterman at the top of the Hatton Flight, the Boot at Lapworth and ther Fleur de Lys at Lowsonford. Actually, it all gets mixed up here because one day I managed to squeeze in 6 pints of Guiness spread across two pubs and for the life of me, I can’t remember which one and which day! Yes, I remember now.. the Boot for lunch and the Fleur de Lys for dinner. Thirsty work being a narrowboat driver. We were also lucky to meet Mike and Jackie again on the Narrowboat Wordsworth. A cracking couple and we love them to bits!

Although this trip is full of locks and I counted nearly 75 just to get there, it didn’t seem too bad, although Wendy’s elbow seems to flare up on the really big days. Stratford locks are tough for little ones too. You would expect them to be soft like the Oxford but someone forgot to grease the lot for the last 100 years. I was hauled off a number of times to lend a hand and my woolly mammoth strength to the padddles – or the gates. However a very pleasant journey all the same. I did find the Stratford canal locks tighter than the Oxford too. They are certainly a whisker smaller and a couple of times, I nearly got stuck. I’m in need of a bit of paint now since the rubbing strakes are down to Jonathon Wilson’s bare steel (sorry Pal!).

Ian Lockkeeper from British WaterwasyWe had one incident with the last lock gate on the last lock on the Stratford. The bloody gate wouldn’t close completely. I sat there in the boat waiting for Wendy to open the gate and nothing. I shouted across the pound what was the problem. She just said it filling slowly. Clearly there was an issue though since it just wouldn’t fill and when I decided to pull over, I was grounding – an indication that we’d nearly emptied the damned pound! A good old-fashioned leap from me and I was on dry land, investigating the issue. Yes, the last lock gate was jammed open and water was pouring through it. We’d never be able to fill the lock, it was like trying to run a bath with the plug out. A bystander came up with the idea of flushing the lock. In other words, try and fill it but with the front gate wide open for a few seconds. That might shift what ever it was. We tried this and then I realised out boat was worse off, sitting at an angle dry land almost, with the keel exposed – I could even see the propeller!

After a bit of hydromatics (new word, I just made it up!), we agreed to call British Waterways and they turned up fairly rapidly to see what they could do. A longer wait and mega-man Ian turns up. Blimey, he’s a strapping bloke this Ian! Massive. He ends up in the drink with his dry suit on and finds a log jamming the gate. Eventually we’re on our way again.

So, after three days in Stratford, moored next to Mike and Jackie – and having dinner with Marcus and Tracey and the following night with John and Lutty, we untied and went on our way. However not only had my mascot duck been kidnapped (which is rather funny and I got it back) we had to endure a bloody racket from some Univerity students who had drunk far too much. They were still dancing on the roof at 4:30am in the morning. One even went to sleep up there. We followed them home for a while back up the lock system. They were still partying!

Just before leaving on Sunday, we managed to grab a quick pump-out, fill with water and cruised up the Avon for 20 minutes. Finally at about 2:00pm, we made our way through the first dozen or so locks, leaving us with one big push on Easter Monday where we managed to get all the way to Knowle locks.

In terms of engineering issues this trip, the bloody toilet seems to get stuck on every second flush or so. I’ve no idea why. I did find some wire shoved up the kitchen sink drain-away pipe, there was some plastic bag ties pushed hard up the pipe. I’m wondering if the breather pipe for the black water system might have been tampered with too which means that maybe the tank gets put under pressure and it doesn’t want to accept any more debris until the system has equalised. I have just thought that first flush of the day normally works. I think I’m on to something here. I’ll work out a way of checking this.

There’s still an odour from the master bedroom. This is where we had the leak last year. It dried out but still causes this stale smell. I wonder how long it will keep up?

I want a battery management information system. I have little idea about power consumption because I don’t have a power meter. Victron Energy do a really cool meter called a BMV-600 with is just ideal. It has a programable relay so there’s some interesting thoughts working in my head about starting the engine automatically if the house batteries start to run dry. Watch this space.

Cheers for now,

C.

Quadrifilar wound toroids (and Coax Cable stub filters)

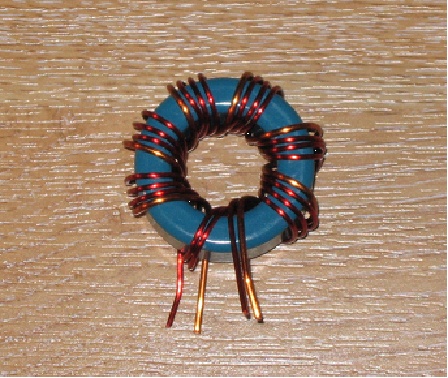
quadrifilar wound toroidJames (M3YOM) has just emailed me after discovering something worse than fitting 90 or so PL259s last week; it’s winding quadrifilar wound toroids. Pictured is a completed L1 winding for the 40m filter. He says that it’s a T130-0 core with 7 quadrifilar windings which should give around 3.96uH and there are two in the filter box he’s making from a kit supplied by Bob Henderson.

Since James took on the job of producing a fully filtered Multi-Two station, he’s soldered nearly 100 PL259s and not one of them was faulty on the day. Good job OM!

James, the wire looks like that stuff we made the MegLoop with, is it?

James says:

“It’s not the megaloop wire, the Lo-Z winding (yellow wire) is 1.25mm solderable enamelled wire and the Hi-Z winding (Red wire) is 1mm solderable enamelled wire. The enamel is designed to burn away at low temperature so you can solder it directly without the need for striping it back first.

Incidentally, Bob’s callsign is 5B4AGN (he used to be a G3 before he moved) “

Bob, I’m sorry you used to be a G3. You should know that I’m forever poking serious fun at G3s, as they poke fun at M3s. Maybe you and I can form a truce and make the world a happier place?

73 all, particularly my new G3 friends.

C.

M0XXT CQ WPX 2009 (Amateur Radio Contest)

M0XXT UK Scout Contest TeamMy thanks to Lee (G0MTN) James (M3YOM) Terry (G4MKP) and Aidan (M6TTT, Scout) for getting our new station on the air for a first-time-out on WPX.

We also roped in Chris and Dan, two new foundation student contest Scouts for the spotting on the Mult Station. Barry M0DGQ also gets a big thank you for supplying hundreds of meters of 75 ohm coax for James’s stub-filter project and Charles at Moonraker for sponsoring the large number of required PL259 and T pieces.

We ran a pair of very old Yaesu FT1000MPs (non-Inrad versions) which were completely swamped by QRM to a number of interesting antennas including our new super all-band Mega-Loop (horizontal delta loop at 85 feet) delivering about 12dbi on 20m to US at 10 degrees elevation (more on higher bands). However, it also delivers 10dbi to EU and most of Russia at a very low angle, hence QRM flooding. James’s stub filter project worked but still needs some tweaking. Thanks to K1TTT for helping James get his head around this. Next time, James will have finished Bob Henderson’s filters as well which should sort out any final interference between bands. Poor James soldered nearly 100 PL259s last week. Don’t worry James, fingers should re-grow by CQWW!

The mult station ran Terry’s A3S at 30 feet on my hydraulic tower and also switched in a 200 foot doublet at 80 feet across the tree canopy behind the Scout Hut for the low bands (which worked great on 40m DX but rubbish for 40m NVIS). Need some switchable low dipoles for EU.

We had an initial target of 2,500 QSOs and 1,000 mults and just missed both by a whisker.

  Band    QSOs     Pts  WPX 
   1.8     152     301   50 
   3.5     574    1513  313 
     7     866    2203  264 
    14     722    1378  269 
    21     102     254   63 
 Total    2416    5649  959 
Score: 5,417,391 

We had two breaks of 30 minutes each to sit and have dinner / lunch as a team, an important lesson to keep morale and spirits high. Some day we might not be able to afford time off, however whilst we’re still novices and part-time, we can afford to have a lazy lounge around. We sent our score to GETSCORES every 5 minutes automatically fed by N1MM on a local wireless LAN picked up from my house about a 900 meters away. S51A and ourselves played ping-pong on the scoreboard for the whole 48 hours and we’ve since become competitive friends.

We particularly liked GETSCORES since it’s a way of interfacing with the rest of the world and having even more fun. I don’t understand why more stations don’t use this system. The USA seem to embrace this stuff quicker than others.

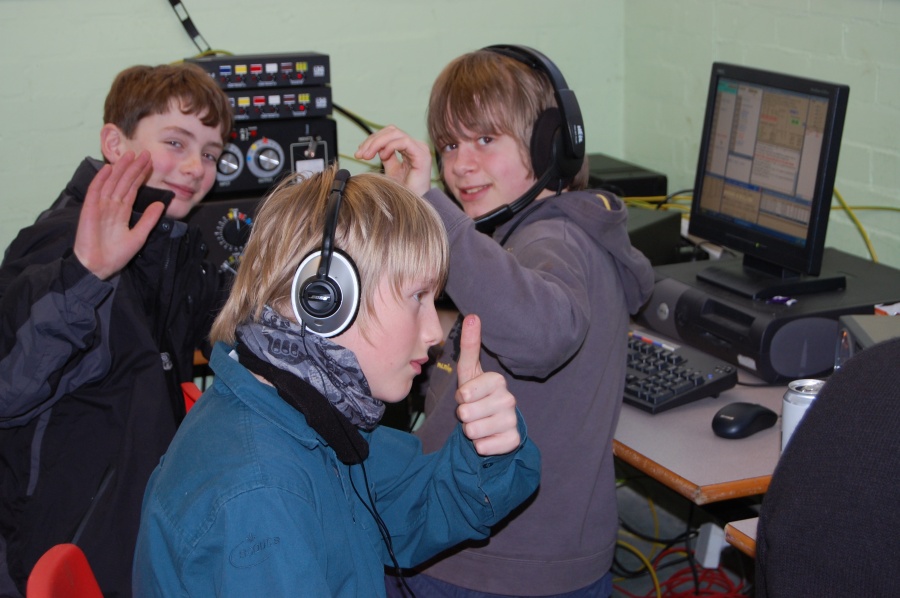
There were many highlights. Working VK on short path AND long path on both days on 40m was a privilage. Many more experienced contesters might have done this before but at last a first for me. Having the young non-licensed Scouts successfully finding some RED mults on N1MM was cool. Being called in just to work them was even cooler! Handing the headset over and telling them, “Great. Find some more!” was even better than cool! James’s run into South America was nice on 15m on Sunday, as was the long run on 20m band. Being spotted three times in 5 minutes from the West then the East then the West again was like using a very high gain vertical (which was the bloody trouble actually since we couldn’t dial out the QR Mary).

Like all (good?) contest teams, we’re now working on massive improvements since the station only came together on the Thursday and we started transmitting essentially 90 minutes before the off. Everything worked, nothing broke. Amazing.

73

C.